PowerList Tag lets you create and manage labels for your PowerLists so teams can group lists consistently (for example by priority, campaign type, or follow-up state). Each tag can also be restricted by role, so only selected roles can view/use it.Documentation Index
Fetch the complete documentation index at: https://docs.aisync.link/llms.txt
Use this file to discover all available pages before exploring further.
- Tag name
- optional role access links (Assign role View)
- created/updated timestamps
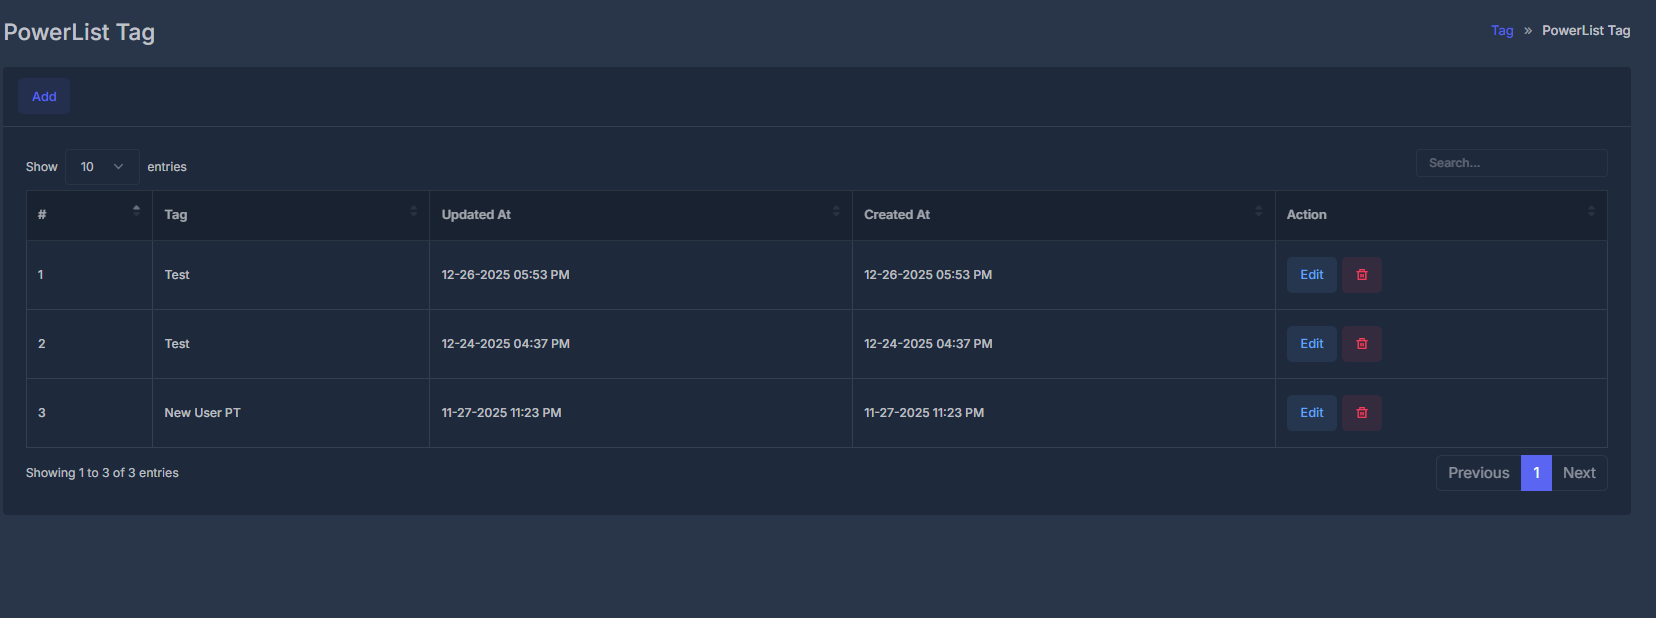
🗂️ Main list
When you open the screen, you see a table of PowerList tags (typically newest first).| Column | Meaning |
|---|---|
| # | Row number in current list view. |
| Tag | Tag label name. |
| Updated At | Last modified date/time (your timezone). |
| Created At | First created date/time (your timezone). |
| Action | Edit/delete controls for that row. |
⚙️ List controls
- Add opens create form.
- Search filters rows (
Search...placeholder). - Pagination keeps long lists easy to scan (often 10 rows/page by default).
➕ Adding a new tag
- Click Add.
- List hides and Add PowerList Tag form opens.
- Fill fields.
- Click Submit.
- On success: green confirmation + page refresh/list reload.
- On failure: red message with reason.
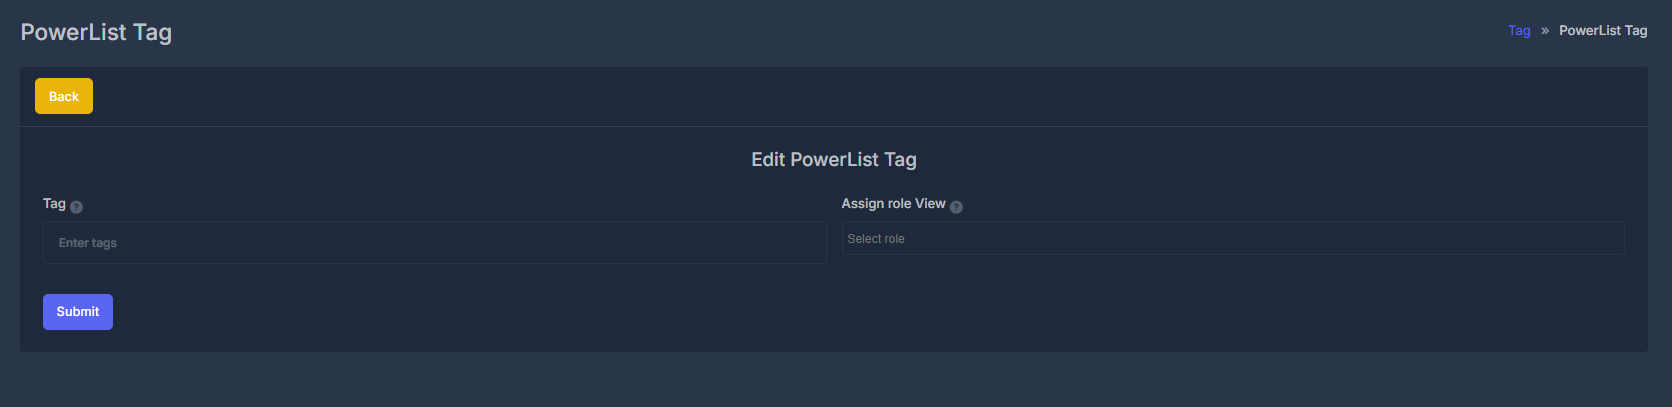
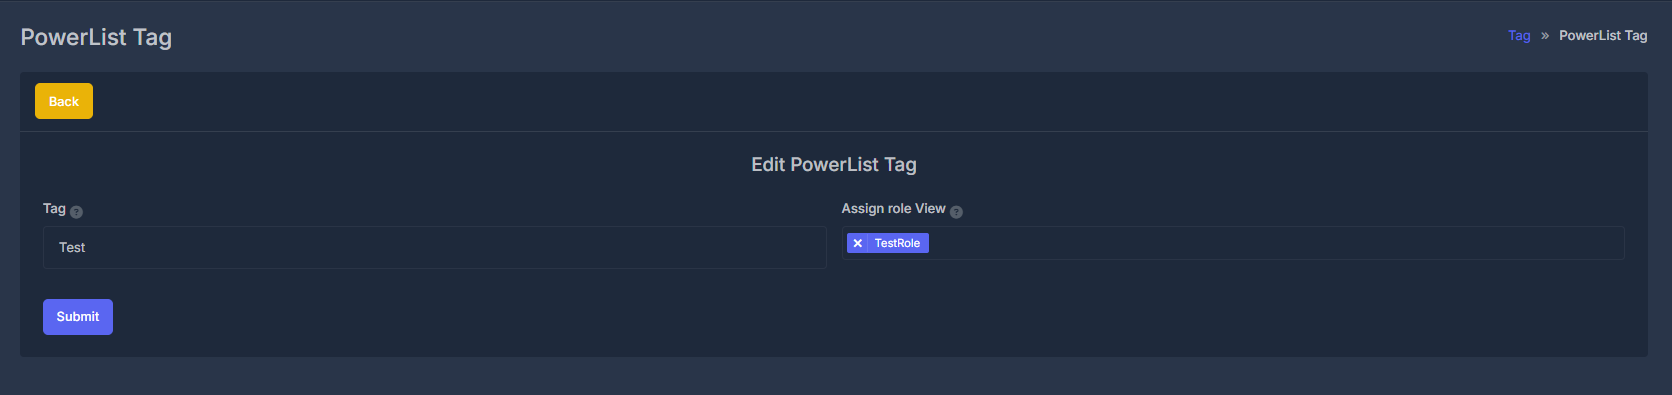
✏️ Editing a tag
- Click Edit in the row.
- Edit PowerList Tag form opens with existing values loaded.
- Update Tag and/or Assign role View.
- Click Submit.
📝 Form fields
🏷️ Tag (required)- The visible label name used across PowerList screens.
- Required before submit.
- Max length is typically up to 100 characters.
- Help tooltip explains this field is for categorizing/organizing PowerLists.
- Multi-select list of organization roles.
- Choose one or more roles allowed to view/use this tag.
- Searchable picker makes long role lists easier.
- Help text explains multi-role access behavior.
- Click row trash icon.
- Confirm prompt (Are you sure?).
- tag is removed,
- linked role assignments for that tag are removed,
- list reloads with success message.