Documentation Index
Fetch the complete documentation index at: https://docs.aisync.link/llms.txt
Use this file to discover all available pages before exploring further.
⚙️ Widget Configuration Interface
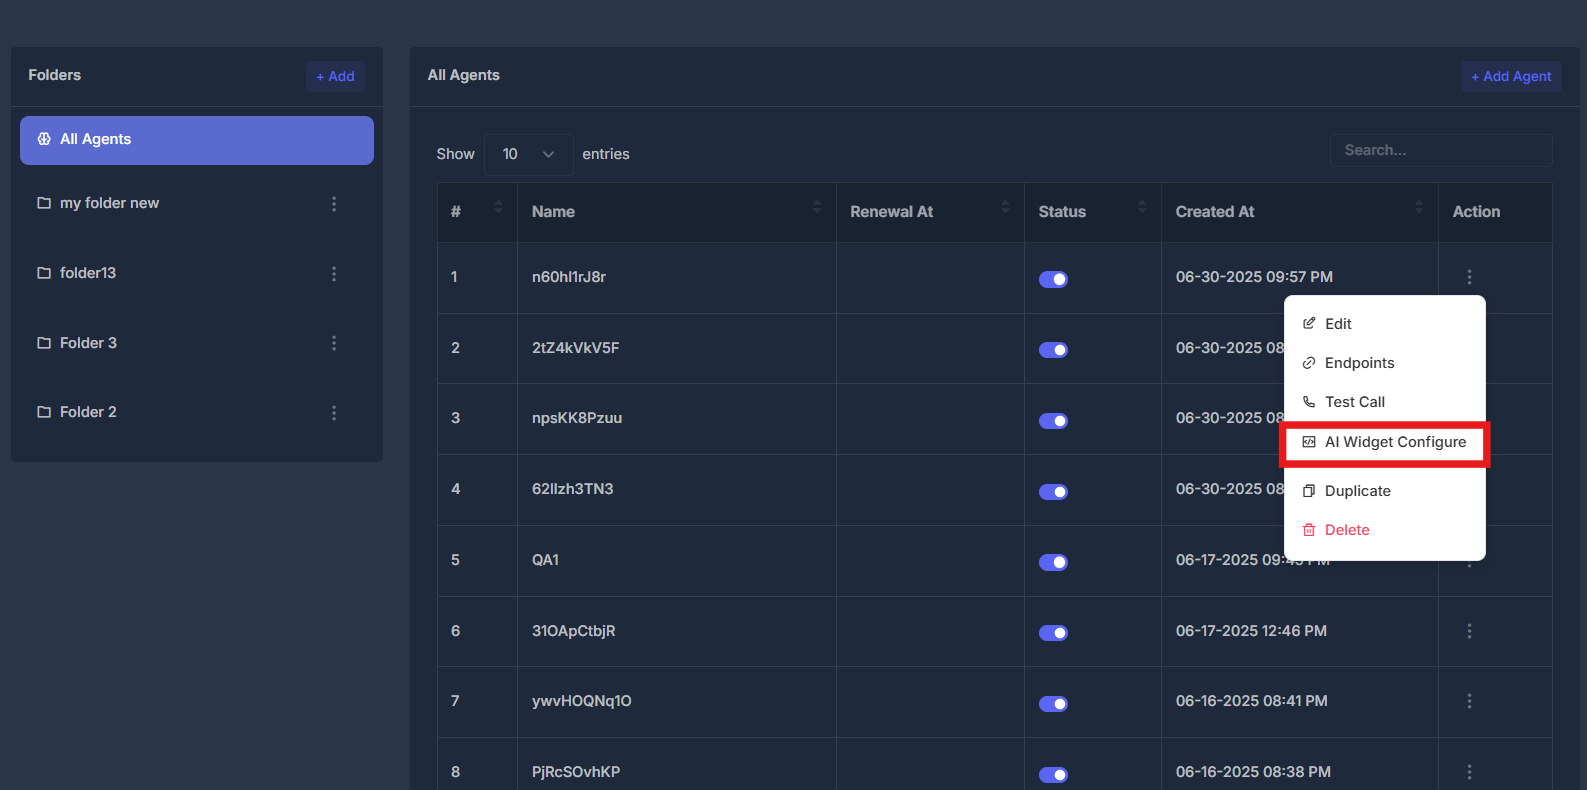
🎯 Access Widget Configuration
- Agent Actions Menu - Click the action button (⋮) next to any agent
- Select AI Widget Configure - Choose from the dropdown menu
- Configuration Panel - Opens comprehensive widget customization interface
👁️ Widget Configuration Overview
The AI Widget Configure interface offers extensive customization capabilities for your website’s AI call widget. This centralized control panel enables you to tailor the widget’s visual design, operational features, and messaging to align with your brand identity and enhance user engagement.
🔄 Configuration Changes & Preview
The widget configuration interface provides real-time feedback on your customizations through an integrated preview system.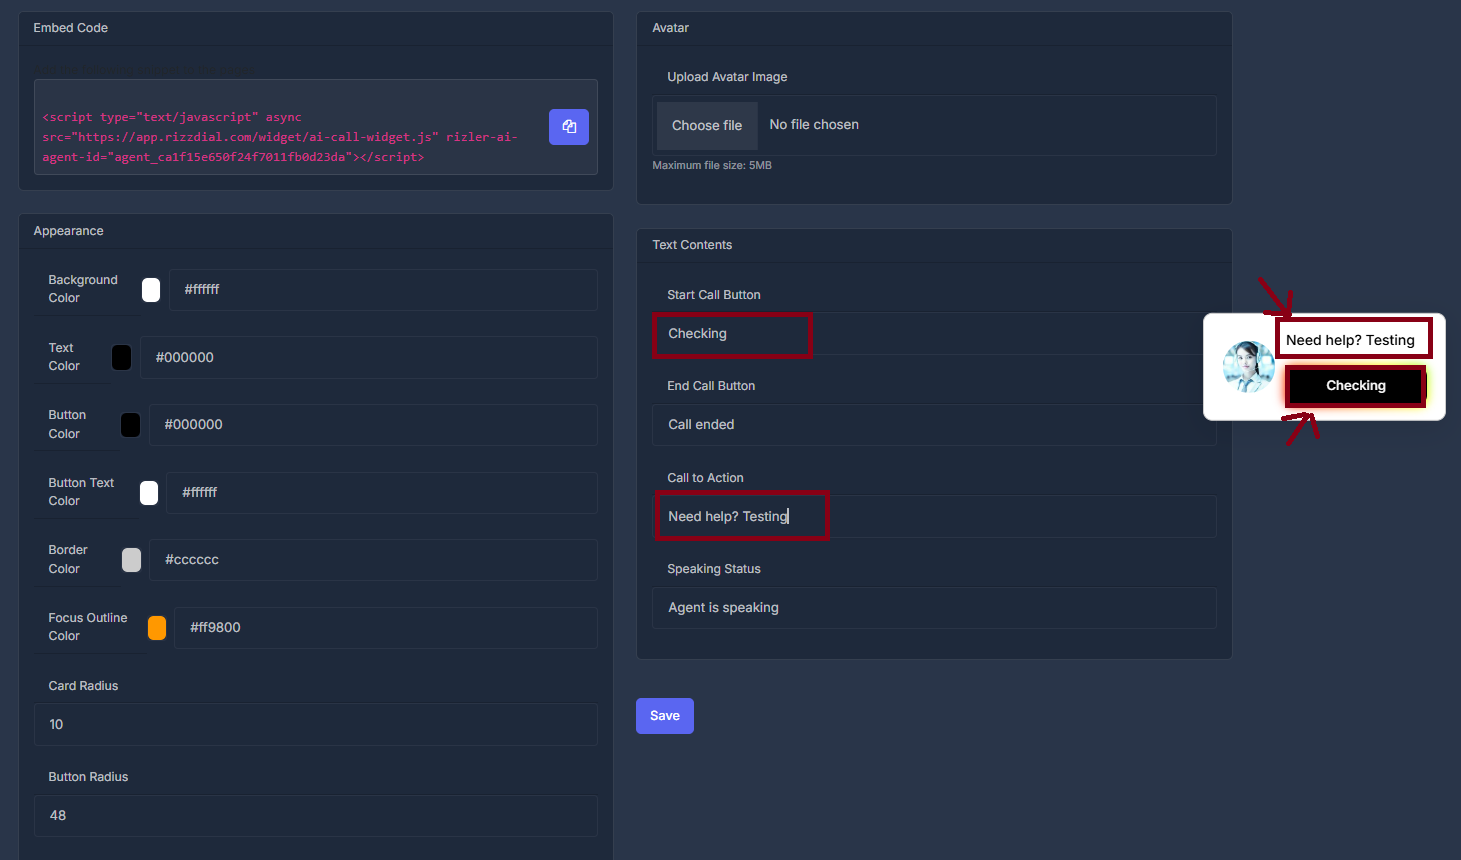
💡 Live Preview: Any changes you make to the configuration fields will be instantly reflected in the AI widget preview displayed in the bottom-right corner of the screen. This allows you to see exactly how your customizations will appear to website visitors before implementing them.
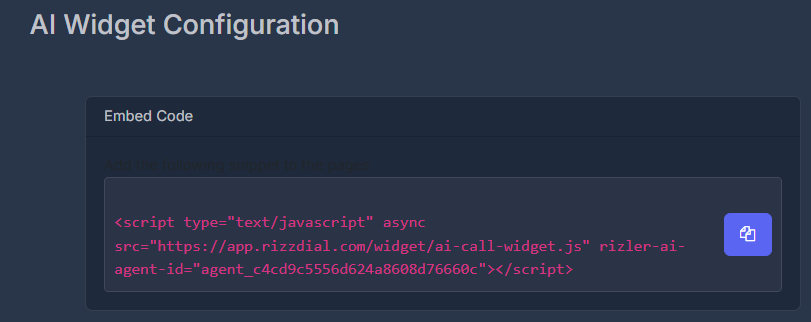
💻 Embed Code Section
- JavaScript Integration - Ready-to-use embed code for website integration
- Copy Code - Click the copy button to get the embed script
- Agent-Specific - Each agent has unique embed code with agent ID
- Async Loading - Non-blocking script for optimal website performance
🤖 Avatar Configuration
📸 Avatar Upload
- Upload Avatar Image - Custom avatar image for the widget
- Choose File - Select image file from local computer
- File Support - Common image formats (PNG, JPG, GIF)
- Avatar Display - Shows in widget conversation interface
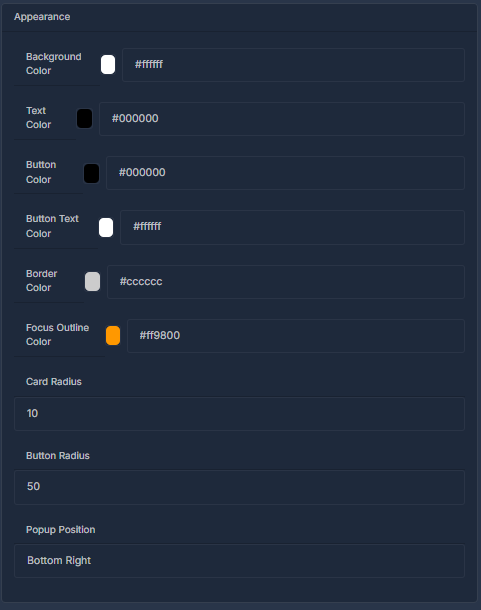
🎨 Appearance Customization
- Background Color - Widget background color
- Text Color - Main text color for widget content
- Button Color - Primary button background color
- Button Text Color - Button text color
- Border Color - Widget border and outline color
- Focus Outline Color - Highlight color for focused elements
- Card Radius - Border radius for widget container
- Button Radius - Border radius for buttons
- Popup Position - Widget placement on webpage
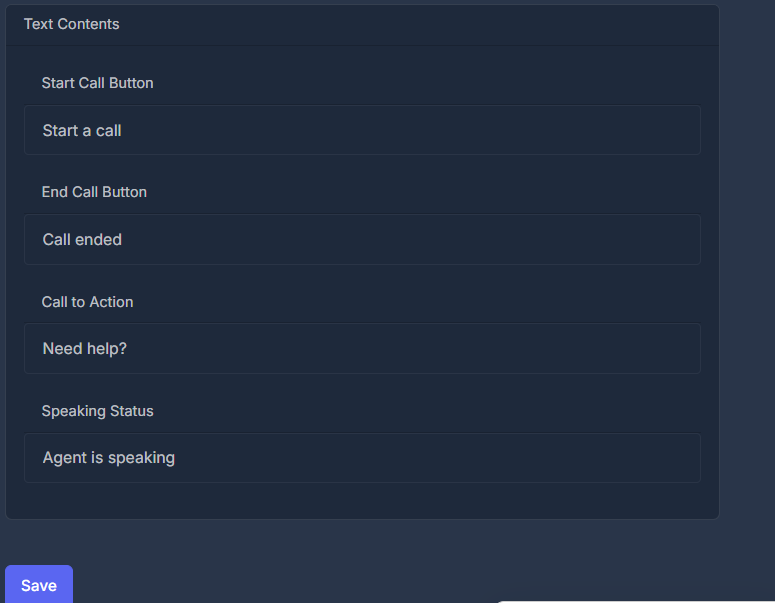
✏️ Text Contents Configuration
📝 Button Text Customization
- Start Call Button - Text displayed on call initiation button (default: “Start a call”)
- End Call Button - Text shown when call ends (default: “Call ended”)
- Call to Action - Header text to engage users (default: “Need help?”)
- Speaking Status - Text displayed during active calls (default: “Agent is speaking”)
⚡ Quick Actions
Copy Embed Code
Get JavaScript code for website integration
Customize Appearance
Configure colors, text, and visual elements
Upload Avatar
Add custom avatar image for widget interface
Save Configuration
Apply changes and update widget settings